Why make a blog
This question is reasonable as there are several options such as Medium or Wordpress that can help one get setup with a blog without much trouble. The reasons I decided to setup my own blog are as follows:
- Show off R skills - I wanted to have a blog specifically to show off data science work. Setting up a blog using Rstudio provides me with a straight forward R project to get started on.
- Rmarkdown is much better at presenting analytical work than markdown (Jekyll).
- Efficient Workflow - Having a work flow setup that allows publishing directly from Rstudio allows is very convinient and allows me to focus on content once I have everything setup.
- Design - Being a trained architect, I cannot work on a system that does not allow me full control of how it looks. May be a bit of OCD here but that’s just me.
Disclaimer
Not intented to teach others but for personal documentation. Others are free to learn tho if the documentation makes sense.
Components
All that was needed to come together for this blog to work is as follows:
Overview of the Setup
This blog is an extension to my named website www.akshaymalik.com. I bought the domain from Google domains for about $12 per year. Then I created a github account and using Github Pages created a landing page with some basic html and css. I did scrape the css from mdo just because it is one of the best minimalistic layout and design I have seen.
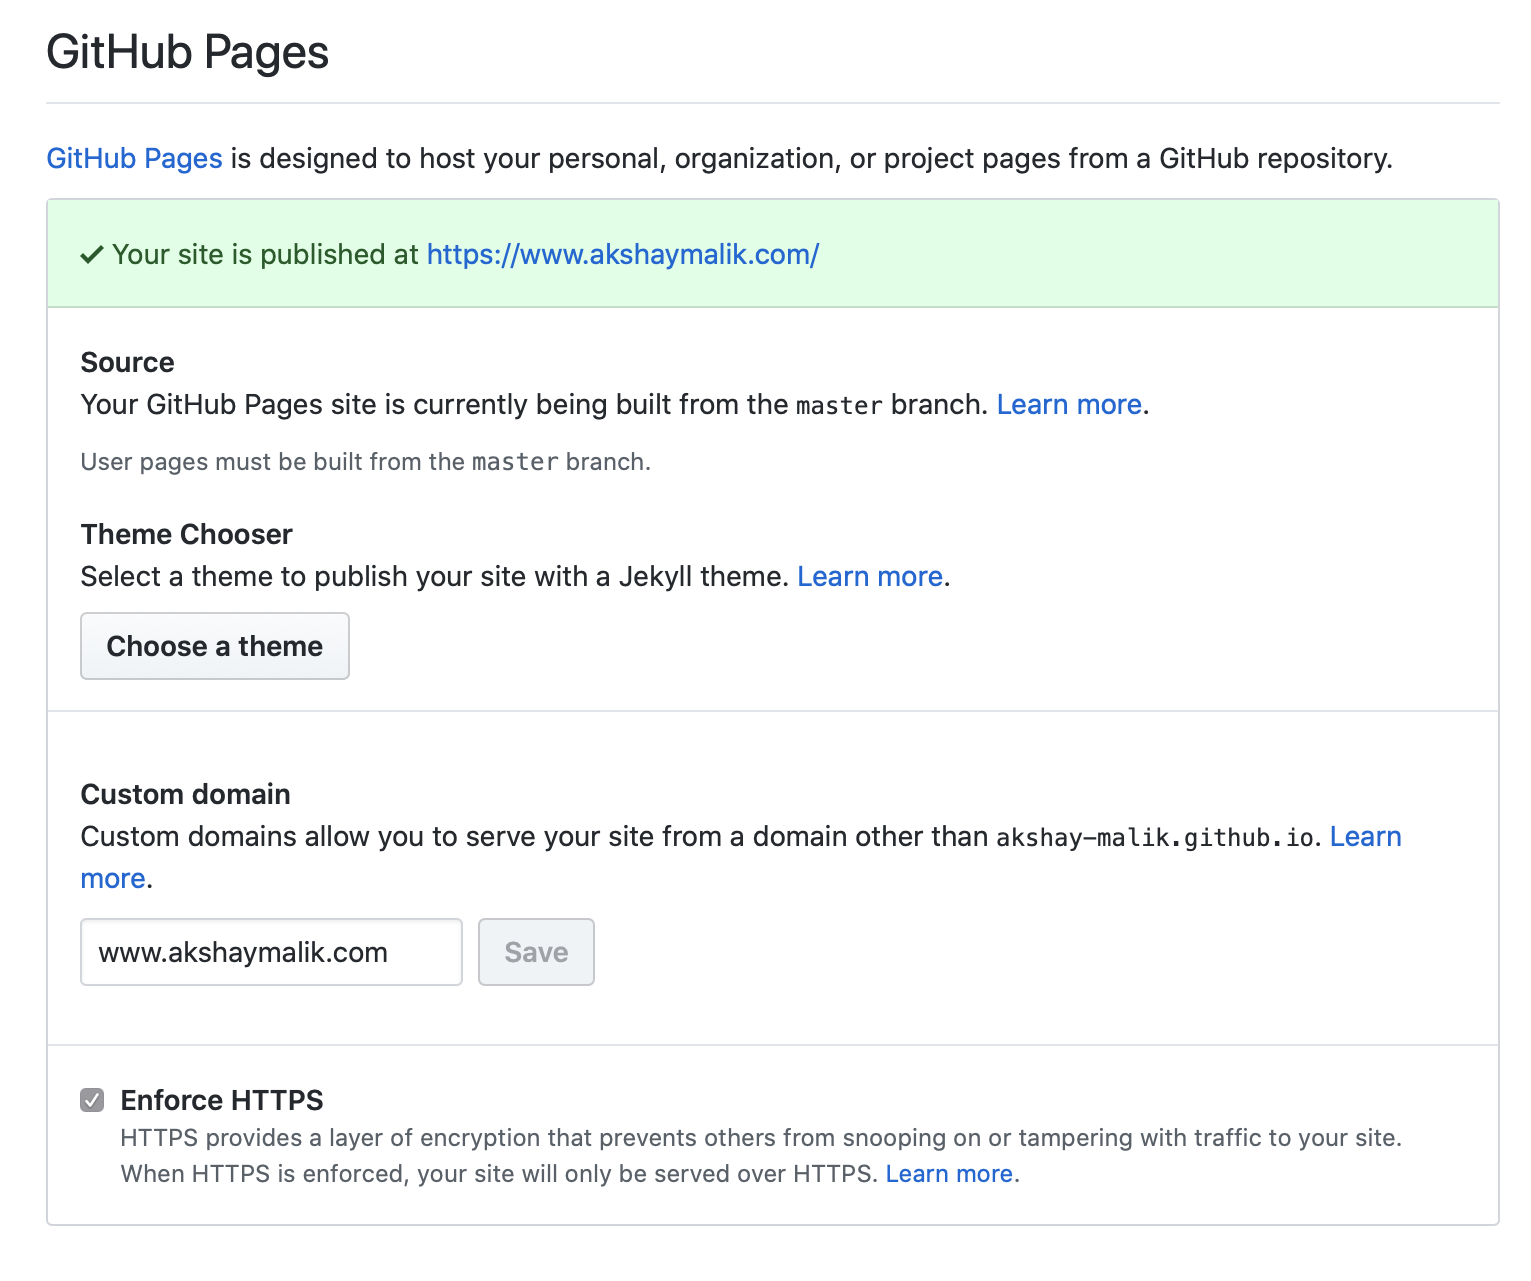
At this point I had a landing page with some links all at a url https://akshay-malik.github.io. To make it point to the domain name I bought from Google, I go the settings tab on the github repo and scroll down to the section with the header Github Pages. Here I need to enter under custom domain, the name of my domain like so:

Addtitionally, a file must be added to the repo called CNAME and all it needs to contain is the url you are pointing it to, in this case www.akshaymalik.com. You need to fix a few things in your domain setting as well but that is something that google has good documentation on and I cannnot cover that here.
Now, with a landing page and the url setup, next step was to setup the pipeline to write content from RStudio and have it tranlated to a webpage. This is achieved using Blogdown. This library in RStudio uses Hugo to translate Rmarkdown into HTML/CSS/Js. Additionally, it allows charts and all the great visualizations from RStudio to be made into a webpage without me writing any code for it.
RStudio
Download the latest version from here and open/run the application on your system/computer. If you are not familiar with this software, I recommend checking out some free courses by DataCamp to get started.
Here’s the nickle tour:
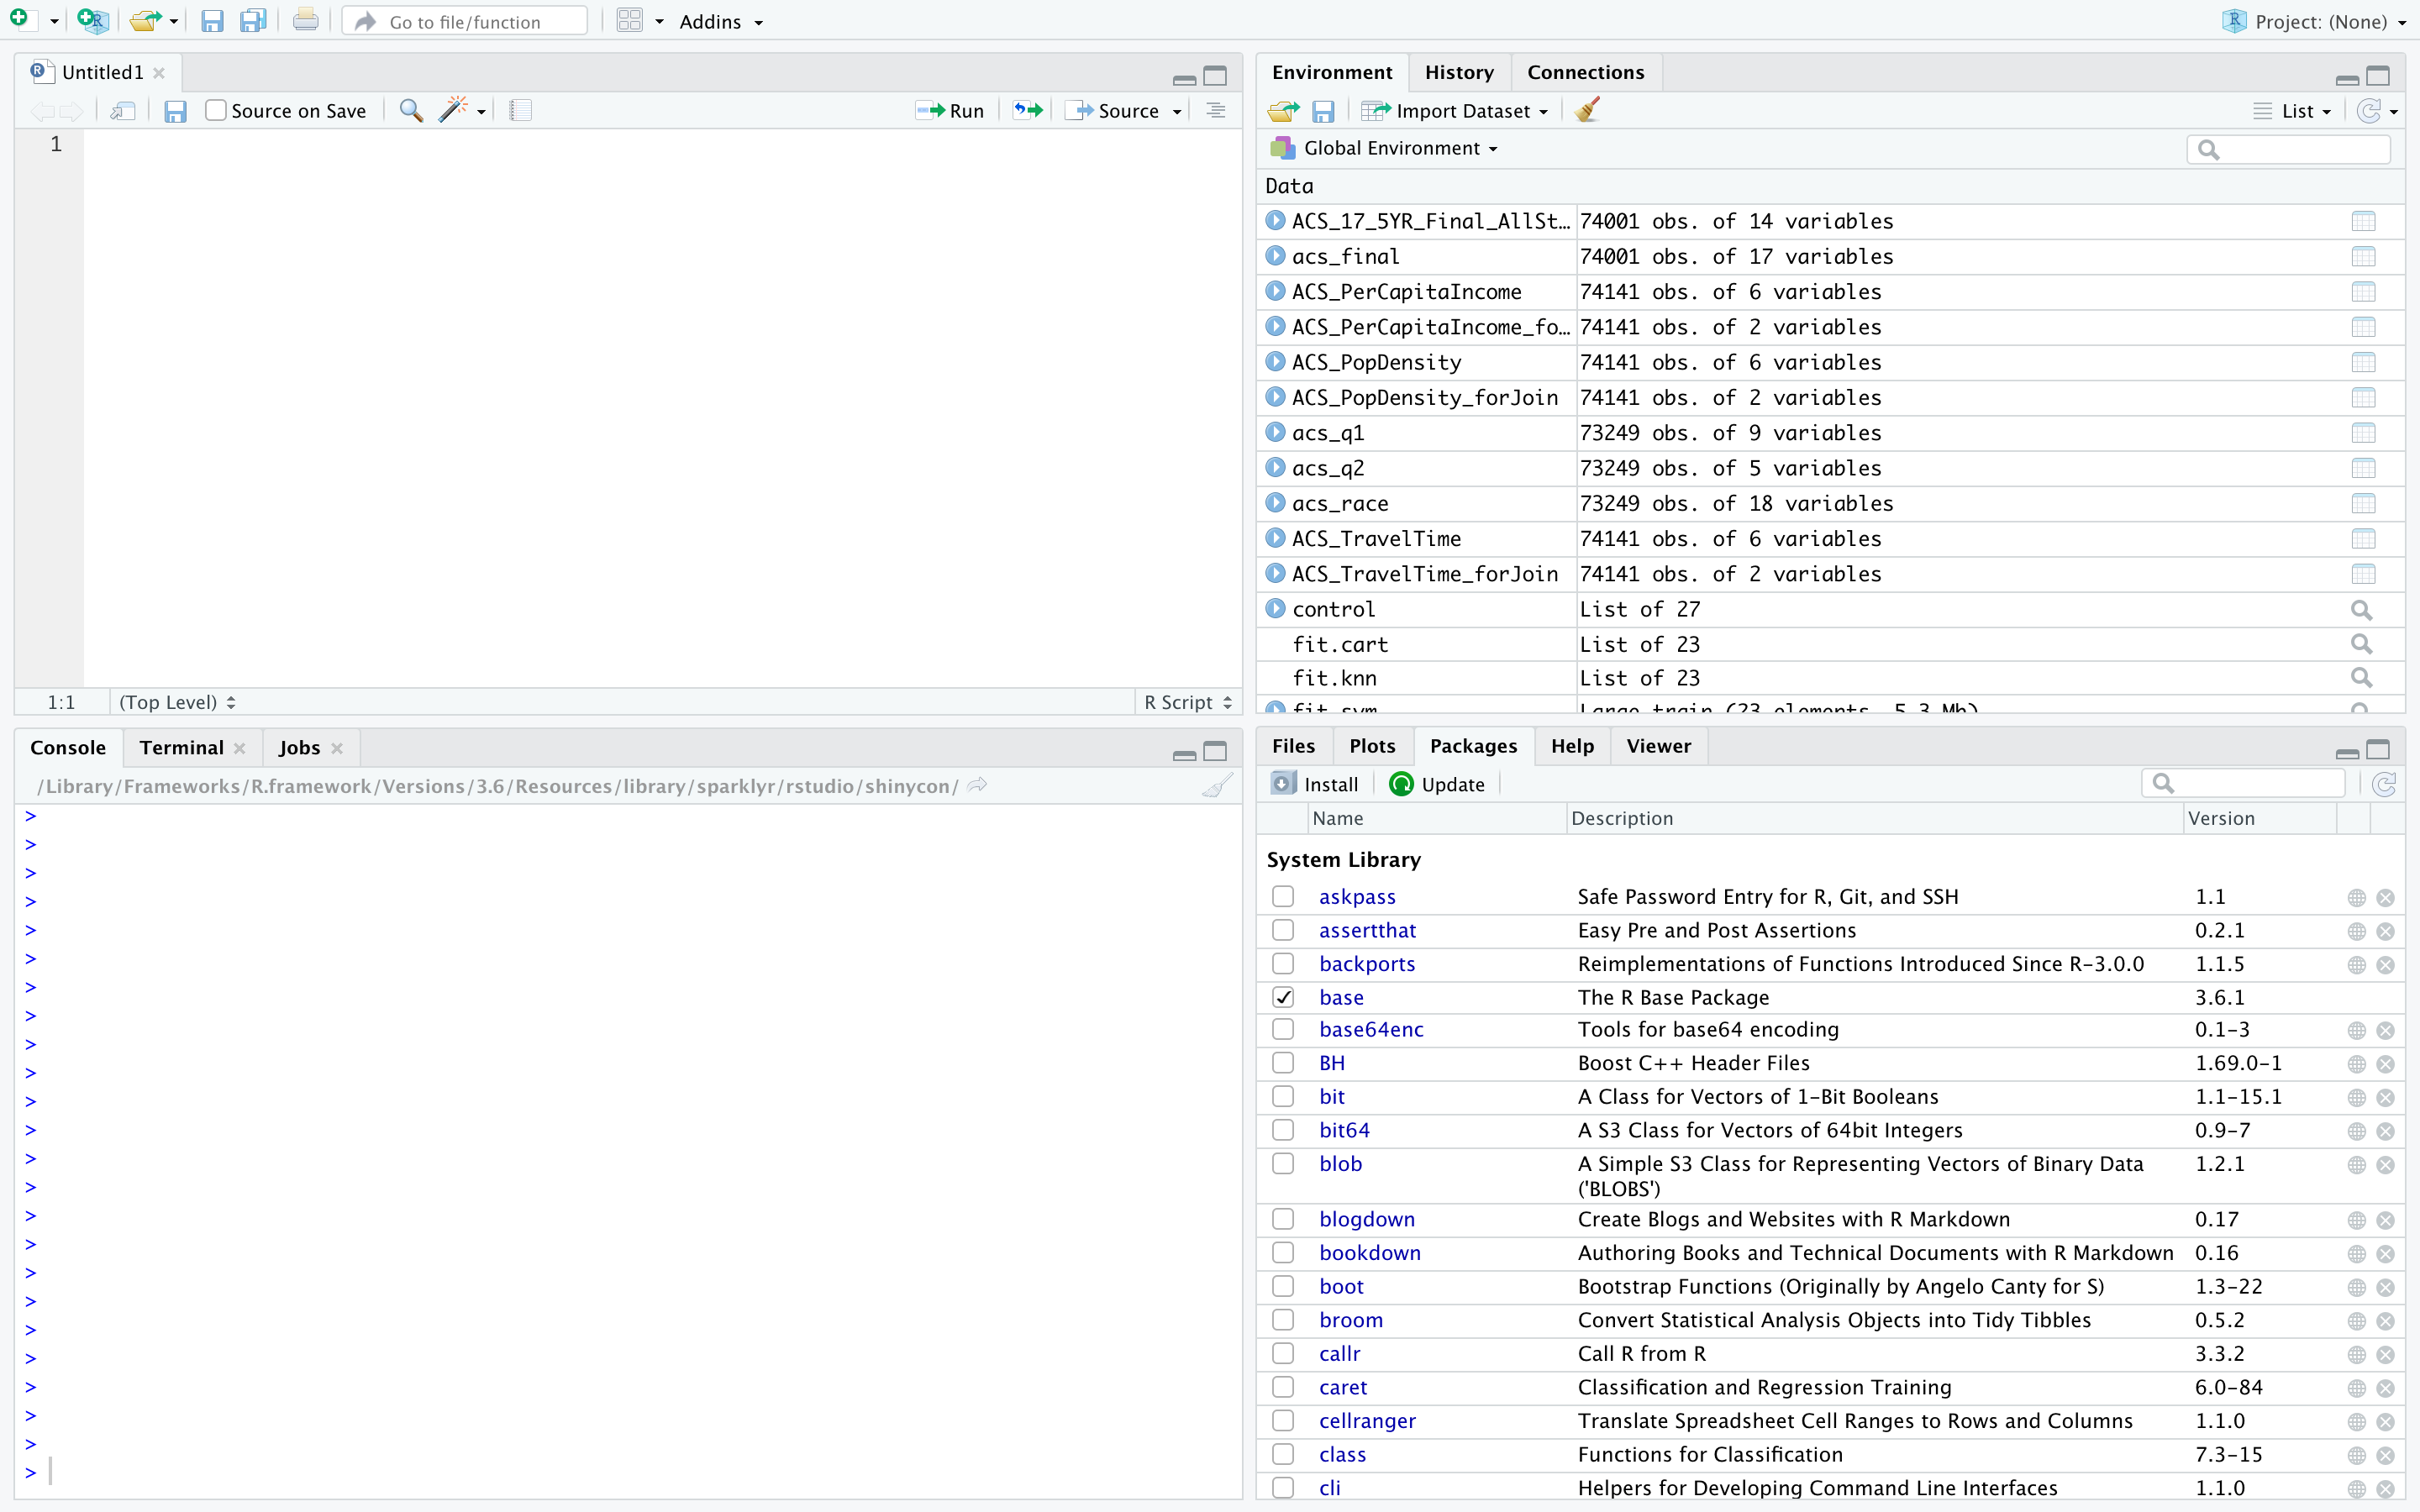
- Once setup and run, you will see the default arrangement as seen in the image below

- The code is typed in the upper left box
- Files (similar to Finder/Explorer) are seen in bottom right
- Logs of the code running are seen in the Console panel in the bottom left
- Top right panel has various functional tabs but the most I end up using here is access to stored variables that get generated in a given project or data imported.
Check out any number of tutorials on how to write code in Rstudio.
Blogdown
This is a good tool to develop a website but it has some basic functional requirements to get started with a blog. I highly recommend going through the documentation here.
Here are some good links to walk through the process of setting up a blog using blogdown: - Alison Hill - Emily Zabor
These were the two that I used.
I am sure a good google search may lead to some more recent results on blogdown and setting up a blog. But that is just half the story. Once you have everything setup, for someone like me who really wants full control of the design aspect of the pages, it was key to know how to setup the CSS and Hugo to get the desired results on TAGS and CATEGORIES.
Hugo
To get a sense of how Hugo worked, I tried to wrap my head around some basic concepts such as: - partial templates - []